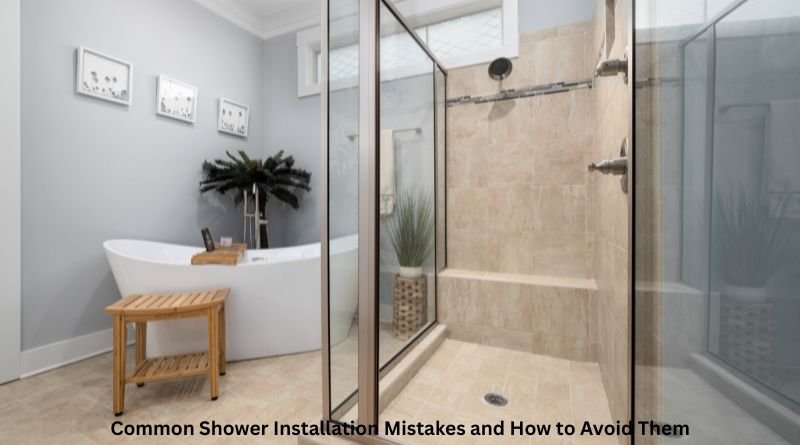
A new shower can completely transform a bathroom but only when it’s built correctly. What looks like a straightforward weekend project can quietly become a costly disaster if a few critical steps are skipped or rushed.
Water damage, mold behind walls, cracked tiles, and failed drains are just some of the consequences homeowners face after a poorly executed shower installation. The frustrating part? Most of these problems are entirely avoidable.
If you’re planning a shower upgrade whether as a DIY project or with contractor help knowing where things commonly go wrong puts you miles ahead of the average homeowner.
Why Getting Shower Installation Right the First Time Matters
Think of your shower as more than just a fixture. It’s a sealed, waterproofed system that handles daily exposure to heat, moisture, and pressure. Every component from the backer board to the drain has to work together seamlessly.
When any part of that system fails, the consequences spread fast:
- Water works its way silently into walls and subfloors
- Mold colonies develop behind tile where you can’t see or smell them immediately
- Substrate damage weakens the structural support beneath your tile
- Repair bills often dwarf the original cost of the installation itself
The bottom line is simple, doing it right the first time is always the more affordable choice.
The Most Common Shower Installation MistakesSkipping or Rushing Waterproofing
This is the single biggest mistake made during shower installation, and it’s surprisingly common. Many homeowners assume that tile and grout are waterproof on their own. They’re not. Both are porous materials, and over time, water finds every gap.
A proper waterproof membrane needs to be applied across all wall surfaces and the shower floor before any tile goes down. Corners and seams deserve extra attention, they’re the first places water exploits.
Getting the Floor Slope Wrong
Water needs somewhere to go. If the shower floor isn’t angled correctly toward the drain, it pools and pooled water accelerates mold growth and grout deterioration.
The industry standard is a quarter-inch drop for every foot of floor space leading to the drain. It sounds minor, but without it, you’ll have standing water after every shower. Always verify the slope with a level before committing to tile placement.
Using Materials Not Rated for Wet Environments
Standard drywall behind shower tile is a recipe for mold and structural failure. Regular tile adhesive breaks down under sustained moisture. Not every product on the shelf at your hardware store belongs in a wet environment.
Cement board or a moisture-resistant backer board is the correct substrate for shower walls. Thinset mortar and grout should both carry a wet-area rating. Using the wrong materials might save money upfront but the cost of replacing a failed shower far exceeds any initial savings.
Misaligning the Plumbing Rough-In
Once walls are closed up, fixing plumbing misalignment becomes an invasive and expensive process. Valve placement, showerhead height, and drain positioning all need to be precisely confirmed against your fixture specifications before a single board goes up.
This step gets skipped or rushed more often than it should, and the consequences are always painful.
Shower Installation Problems That Show Up After the Fact
Some shower installation problems don’t reveal themselves immediately. Here’s what to watch for in the weeks and months following a new installation:
- Water collecting at the base of the shower or seeping beneath the threshold
- Grout cracking or crumbling far sooner than it should
- Inconsistent water temperature or noticeably reduced pressure
- A persistent damp or musty smell that doesn’t clear after ventilating the bathroom
- Soft spots or movement when walking on the shower floor
Addressing these early signs early prevents a minor fix from turning into a major reconstruction.
Practical Shower Installation Tips That Make a Real Difference
Whether you’re handling this project yourself or overseeing a contractor, these shower installation tips will protect your investment:
- Map everything out before purchasing materials. Know your rough-in dimensions, confirm fixture compatibility, and buy everything before starting.
- Give waterproofing layers their full cure time. Rushing this step undermines everything built on top of it.
- Invest in the right tools. A quality tile saw, a reliable level, a notched trowel, and a proper grout float are not optional.
- Do a water test before tiling. Block the drain, fill the pan, and wait a full day to confirm nothing is moving.
- Plan for ventilation. A bathroom exhaust fan isn’t just comfort, it’s moisture management that extends the life of your entire installation.
When Professional Shower Installation Is the Smarter Choice
There’s a meaningful difference between a shower that looks finished and one that’s built to last. Professional shower installation brings together technical knowledge, proper tooling, and accountability that most DIY projects simply can’t match.
Professionals bring real advantages to the table:
- They understand local code requirements and build to meet them
- Many offer workmanship warranties that protect you after completion
- Complex layouts, custom fixtures, or structural modifications are handled without guesswork
- The job gets done faster and with far fewer follow-up issues
If your project involves moving plumbing, a custom tile layout, or an older bathroom with unknown substrate conditions, professional installation isn’t an upgrade, it’s a necessity.
Finding a Trusted Shower Installation Expert in Salt Lake City
Look for a shower installation expert in Salt Lake City who offers:
- Current plumbing and contractor licensing
- Transparent project quotes with no hidden fees
- Verifiable reviews from local homeowners
Mr. Expert Plumbing is a trusted local resource for professional shower installation combining plumbing expertise with a track record of quality work across the Salt Lake City area.
Conclusion
A shower that’s installed correctly is one of the most reliable features a home can have. One that’s installed carelessly becomes a recurring source of expense, frustration, and structural risk.
The difference often comes down to awareness. Understanding the most common shower installation mistakes and taking the time to avoid them puts you in a completely different position than the homeowner who wings it and hopes for the best.
Plan carefully. Use the right materials. Give every stage the attention it deserves. And if the project scope exceeds your experience, bring in someone who’s done it a hundred times before. That decision almost always pays for itself.
Frequently Asked Questions
1. How long does a proper shower installation take?
A standard shower installation typically takes 2 to 4 days, depending on complexity. Custom designs, curing time for waterproofing, and tile work can extend the timeline.
2. Can I install a shower myself, or should I hire a professional?
DIY installation is possible for simple setups, but anything involving plumbing changes, waterproofing, or custom tiling is best handled by a professional to avoid costly mistakes.
3. What is the most important step in shower installation?
Waterproofing is the most critical step. Without proper sealing and membrane application, even a well-designed shower can lead to leaks, mold, and structural damage over time.